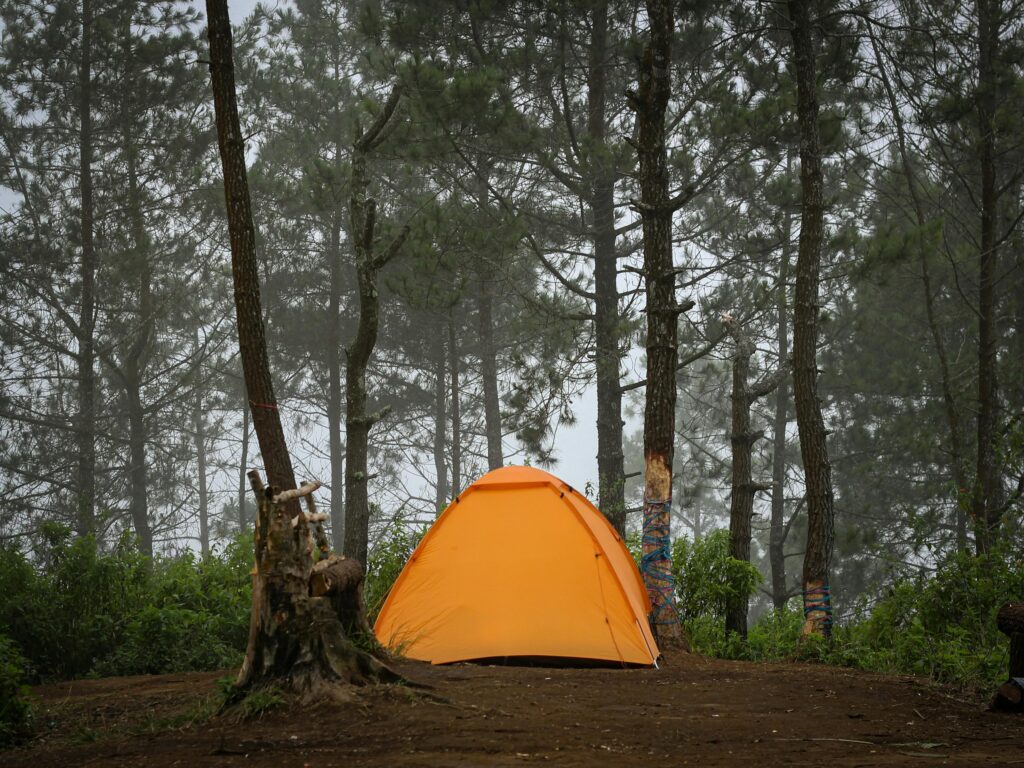
FIELD BRIEFING: Executing solo field operations: tips for independent campers is the ultimate test of your tactical training. When you are a “Unit of One,” there is no backup and no secondary set of eyes to catch a lapse in judgment. Every decision must be calculated, and every safety protocol must be followed with 100% discipline. While solo camping offers unparalleled freedom and immersion, it demands a “High-Alert” level of situational awareness to manage the increased risks of the wild.
1. The Communications Window: The Fail-Safe Protocol
When operating alone, your “Communications Window” is your most critical safety asset. Before deployment, you must establish a rigid check-in protocol with a trusted home-base contact.
- The Detailed Itinerary: Leave a digital and physical map of your intended Area of Operations (AO), including your primary campsite and specific “Bug-Out” extraction routes.
- The Hard Deadline: Establish a “Trigger Time.” If you have not checked in by a specific hour (e.g., Sunday at 1800 hours), your contact is briefed to initiate a formal emergency response. This eliminates the “wait and see” hesitation that can be fatal in a survival scenario.
2. Redundant Survival Gear: The Rule of Two
When you are a solo operative, the “Rule of Two” is not a suggestion—it is the law. You do not have a teammate to borrow a lighter or a headlamp from; you are your own redundancy.
- Critical Duplication: Your solo field operations: tips for independent campers checklist must include two fire starters (e.g., a lighter and a ferro rod), two independent light sources, and two distinct ways to signal for help.
- Failure-Point Management: If you lose your primary tool to a river crossing or mechanical failure, your mission must continue without compromise. Redundancy ensures that a single lost item does not escalate into a life-threatening crisis.
3. The “Base Commander” Tool: Garmin inReach® Messenger
For solo field operations: tips for independent campers, the Garmin inReach Messenger is your ultimate lifeline. In 2026, this device is the gold standard for maintaining a connection to the grid when cell towers are non-existent.
- Global Satellite Messaging: This device provides two-way text messaging and a dedicated SOS button that bypasses traditional networks to connect directly with the IERCC (International Emergency Response Coordination Center).
- Tactical Edge: It allows you to maintain your “Communications Window” even in deep canyons or dense forest canopy. This ensures that even if you are immobilized by injury, Search and Rescue (SAR) can navigate to your exact GPS coordinates with sub-meter precision.
4. Conservative Risk Assessment: The “Low-Impact” Move
A solo mission is the wrong theater to test the outer limits of your physical capabilities. Without a partner to provide a belay or haul a heavy pack, you must adopt a “Conservative Movement” doctrine. In solo field operations: tips for independent campers, ego is a liability; calculated caution is your greatest asset.
- The 70% Confidence Rule: Never execute a maneuver—whether it’s a Class 4 rock scramble, a jump across a chasm, or a traverse over a fallen log—unless you are at least 70% confident you can succeed with minimal effort. If a move requires 100% of your strength and focus, the “Risk-Margin” is too thin.
- Injury Escalation Management: A simple sprained ankle or a minor laceration that would be a manageable inconvenience for a group can rapidly escalate into a “Life-Flight” extraction for a solo operative. Adjust your pace to $80\%$ of your maximum speed and prioritize routes that offer “Safe Passage” over those that offer a “Shortcut.”
5. Solo Scent & Perimeter Management
When the camp is silent, you become more perceptible to the local ecosystem. Without a partner to help pull “Sentry Duty,” your Scent Logistics must be clinically precise. Curious wildlife, from black bears to mountain lions, are less likely to approach a loud group but may investigate a silent, solo bivvy.
- The 200-Foot “Kitchen Zone” Offset: Maintain a strict “Triangle Setup” where your kitchen and food storage are at least 200 feet downwind from your sleeping area. Because you lack a second set of eyes to monitor the perimeter, you must rely on a “Zero-Scent Signature” to avoid unwanted nocturnal visitors.
- Proactive Audio Presence: Since you don’t have a partner to talk to, you must generate “Artificial Noise” when moving through dense brush or “Blind Corners.” Use periodic “Call-Outs” or short whistle blasts to announce your presence. This prevents a “Surprise Encounter,” which is the leading cause of defensive animal attacks on solo hikers.
6. Self-Medical Proficiency: The “Solo IFAK”
In group operations, a teammate can apply a tourniquet or patch a chest wound for you. In solo field operations: tips for independent campers, you are the patient and the surgeon. You must be prepared to perform trauma care under the intense physiological stress of pain and isolation.
- One-Handed Training Protocols: As emphasized in our Field First Aid Briefing, you must have the muscle memory to deploy your Individual First Aid Kit (IFAK) and apply a CAT Tourniquet to any limb using only your non-dominant hand.
- Managing Medical Shock: Prepare for the psychological “After-Action” shock of injury. Solo operatives must remain calm and execute their medical SOPs step-by-step. Panicking increases your heart rate, which accelerates blood loss; staying “Task-Oriented” is as much a medical requirement as it is a mental one.
7. Psychological Fortitude: Managing the “Quiet”
One of the most underestimated challenges of independent camping is the psychological weight of total isolation. When the sun goes down and the “Quiet” sets in, “Analysis Paralysis” or irrational fear can compromise your decision-making.
- The “Duty Cycle” Strategy: Maintain a strict, scheduled “Duty Cycle” to keep your mind occupied. Give yourself specific objectives—filtering precisely 4 liters of water, conducting a gear-repair audit, or documenting the day’s “Ground Intelligence” in your logbook.
- The “HALT” Decision Discipline: If you feel panic or indecision rising, stop and follow the “HALT” protocol (Hungry, Angry, Lonely, Tired). Often, what feels like fear is actually a drop in blood sugar or dehydration. Sitting down to eat a high-calorie snack can stabilize your blood chemistry and restore your tactical clarity.
8. High-Frequency Navigation Checks
When you are alone, “Navigational Drift” occurs much faster because there is no secondary navigator to question your heading. In the absence of a “Red-Team” critique, you must be your own harshest navigator.
- The 15-Minute “Hard-Check”: Audit your Navigation System every 15 minutes without fail. Confirm your current coordinates against a “Handrail” (like a ridge or stream) or a pre-planned “Check-Point.” If your position deviates by even $5^\circ$ from your intended azimuth, stop and recalibrate immediately.
- Signature Tracking (The Reverse Recon): Periodically turn around to memorize the “Reverse View” of the trail. Landscapes can look unrecognizable when traveling in the opposite direction; this “Signature Tracking” ensures that if a sudden weather shift forces a “Rapid Extraction,” the path back to the trailhead is visually familiar and easy to follow.
Final Debrief: The Unit of One
Solo field operations: tips for independent campers represent the pinnacle of outdoor proficiency. By mastering redundancy, satellite communication, and self-rescue techniques, you turn the vulnerability of being alone into a tactical advantage of speed and stealth.
Trust Your Training. Verify Your Gear. Stay Ready.
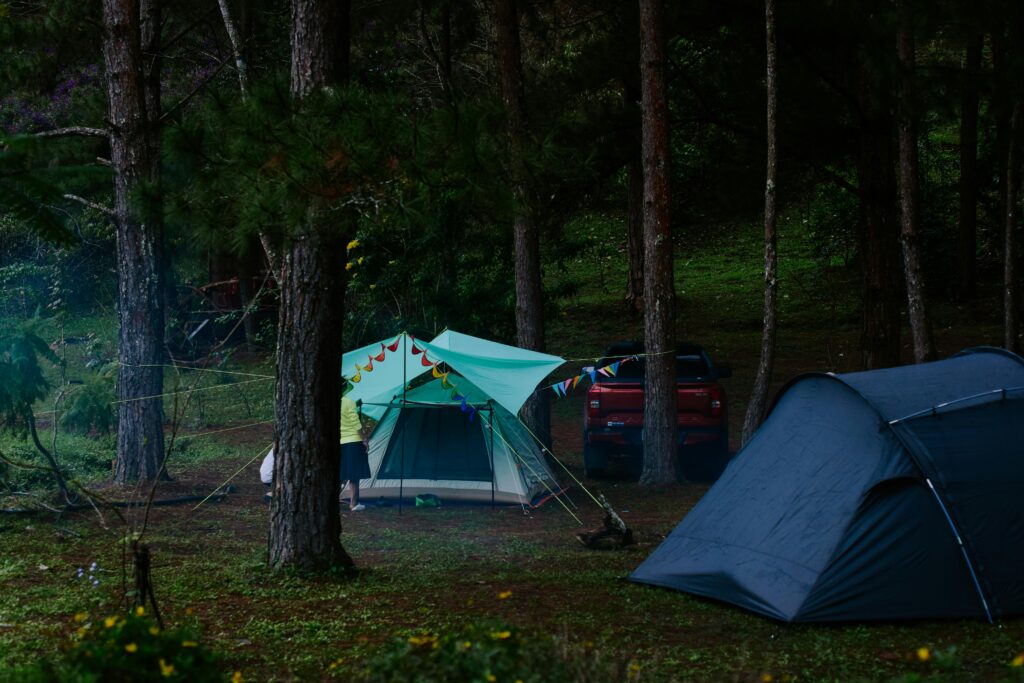
FIELD BRIEFING: When you bring the family into the AO (Area of Operations), your role shifts from solo Scout to Mission Commander. Family missions: camping activities for kids and beginners are the best way to cultivate a “Tactical Mindset” in the next generation of explorers. By reframing standard chores as critical objectives, you maintain high morale and instill essential survival field-craft without the “boredom factor.”
In 2026, building field competence in beginners requires a balance of fun and functional responsibility. This briefing outlines 8 strategic activities to ensure your squad is mission-ready while enjoying the great outdoors.
1. The Scavenger Recon: Environmental Intelligence
Instead of a simple hike, issue a formal “Recon Objective.” This transforms a walk into an active search for “Environmental Intel,” sharpening the observational skills of young scouts. Give your team a list of items to “acquire” (sightings only, strictly adhering to Leave No Trace principles):
- The Apex Sight: Spot a bird of prey (hawk, eagle, or owl) to understand the local food chain.
- Tinder Recon: Identify a source of natural tinder, such as dry pine needles or birch bark, essential for emergency Sustainment Systems.
- Navigational Signage: Locate three different types of trail markers (cairns, blazes, or signs) to understand how “Analog Navigation” works in the field.
2. The “Junior Quartermaster” Drill: Operational Ownership
One of the most effective family missions: camping activities for kids and beginners is assigning specific roles that contribute to the success of the camp. When a beginner feels responsible for a system, their situational awareness increases ten-fold.
- The Water Officer: Tasked with monitoring the “Hydration Reserves,” ensuring all jugs are topped off and alerting the Commander when levels hit the 25% “Red Line.”
- The Light Specialist: Responsible for the “Illumination System.” This scout ensures all headlamps are checked for battery life and staged in a “Quick-Access” location before Night Ops (dusk) begin.
3. The “Base Commander” Tool: Celestron Outland X Binoculars
To keep the squad engaged during family missions: camping activities for kids and beginners, we recommend the Celestron Outland X 8×42 as a primary reconnaissance tool.
- Observation Tactics: These are waterproof and fog-proof, providing the “Operational Durability” needed for younger scouts who may be less careful with gear. High-quality optics turn a distant ridge into an “Observation Target,” allowing beginners to practice long-range spotting.
- Instructional Value: Using binoculars teaches beginners about “Field of View” and how to scan a landscape for movement—a skill that translates directly into our Wildlife Encounter Briefing.
4. Knot-Work Training: The “Secure the Perimeter” Mission
Beginners and younger scouts often struggle with the “fiddly” nature of ropes and cordage. However, by reframing this as a critical mission to “Secure the Gear,” you transform a frustrating chore into a high-stakes game of skill. In any family missions: camping activities for kids and beginners curriculum, knot-work is the foundational language of field-craft.
- The Objective: Issue a directive to secure a high-tension “Gear Line” between two sturdy trees. Instruct your beginners in the use of the Bowline (the “King of Knots”) for the fixed anchor and the Taut-Line Hitch for the adjustable end. These knots are essential for managing a “Bear Bag” hang or creating a dry line for airing out damp clothing.
- The Tension Test and Load Dynamics: Once the knots are seated, have the scouts conduct a “Stress Test” by hanging a weighted rucksack from the center of the line. If the Taut-Line Hitch allows for easy adjustment but holds firm under the weight of the pack, the mission is a “Full Success.” This practical application builds the specific manual dexterity and “Friction Logic” required for deploying advanced Shelter Systems or securing gear in high-wind environments.
5. Tactical Shelter Build: The “Bivvy” Race
Instead of the adults doing all the work, involve beginners in the “Hard-Point” construction. This is a foundational pillar of family missions: camping activities for kids and beginners.
- The Setup: Challenge them to clear the “Tent Pad” of all “Debris” (rocks and sticks) that could puncture the floor.
- The Drill: Show them how to seat a tent pole and have them “Race the Rain” (even on a sunny day) to see how quickly they can snap the fly into place. This builds the muscle memory needed for actual Field Setup Deployment.
6. Fire-Side “Sustainment” Cooking: Thermodynamic Safety
Food is the ultimate morale-booster in any AO, but the kitchen zone is also a high-consequence environment. Teaching beginners to safely manage a stove or a campfire is a major milestone in their journey toward field independence and thermal management.
- Caloric Prep & Ratio Control: Let your beginners lead the “Sustainment System” by measuring the precise water-to-fuel ratios for dehydrated meals. This teaches them that resources are finite. If using a backpacking stove, instruct them on the importance of a level “Stove-Base” to prevent spills, and let them observe how wind affects boil times.
- The “3-Foot Safety Circle”: Establish a strict 3-foot “Safety Circle” (the “No-Fly Zone”) around the fire or stove. Anyone entering this perimeter must announce their presence (e.g., “Coming in!”) to prevent accidental bumps or burns. This drill instills a high degree of Spatial Awareness and teaches beginners to respect the volatile nature of heat sources in a wilderness setting.
7. The Night-Scan: Nocturnal Signature Management
Once the sun dips below the horizon, the mission shifts from visual scouting to “Nocturnal Awareness.” Reframing the “scary” aspects of the dark into a tactical objective helps beginners overcome anxiety by giving them a specific, purposeful role in the squad’s security.
- Perimeter Eyeshine Identification: Using their Black Diamond Headlamps, have the young scouts practice “Scanning the Tree-Line.” Teach them to hold the light at eye level to better catch the tapetum lucidum (reflective layer) of local wildlife. Discussing the different colors of eyeshine—as detailed in our Wildlife Encounter Briefing—turns a potential fear into a high-level reconnaissance exercise.
- Analog Celestial Navigation: Use a stargazing app as a training wheels tool to locate the North Star (Polaris). Explain that while our Navigation and Comms systems are powerful, they rely on batteries and satellites. For centuries, scouts have used this “Fixed Point” for orientation. Teaching a child to find “True North” ensures they have a permanent, fail-safe compass in their mind that never runs out of power.
8. The “Leave No Trace” Extraction Sweep: AO Sanitization
The mission is not officially terminated until the extraction is complete and the AO has been “Sanitized.” This final phase teaches the “No-Trace” Stealth Doctrine, emphasizing that a professional operative leaves no evidence of their presence behind.
- The Tactical “Line-Sweep”: Before the final move-out, have the entire squad stand in a shoulder-to-shoulder line. On your command, walk the campsite slowly in a “Grid Search,” looking for even the smallest “Micro-Trash”—tiny corners of granola bar wrappers, stray threads, or spilled food scraps. These items aren’t just litter; they are “Bio-Signals” that can attract predators to the site after you leave.
- Mission Success Criteria: Only when the site looks identical to how it appeared upon arrival does the “Mission Commander” declare the operation a success. This reinforces a sense of pride and environmental stewardship, ensuring the next generation understands that “High-Impact Gear” should always result in a “Low-Impact Footprint.”
Final Debrief: Building the Next Generation
Family missions: camping activities for kids and beginners are about more than just a weekend trip; they are about fostering resilience, responsibility, and a deep respect for the wild. By treating your family like a tactical squad, you ensure everyone stays safe, engaged, and ready for the next deployment.
Assign the Roles. Secure the Site. Stay Ready.
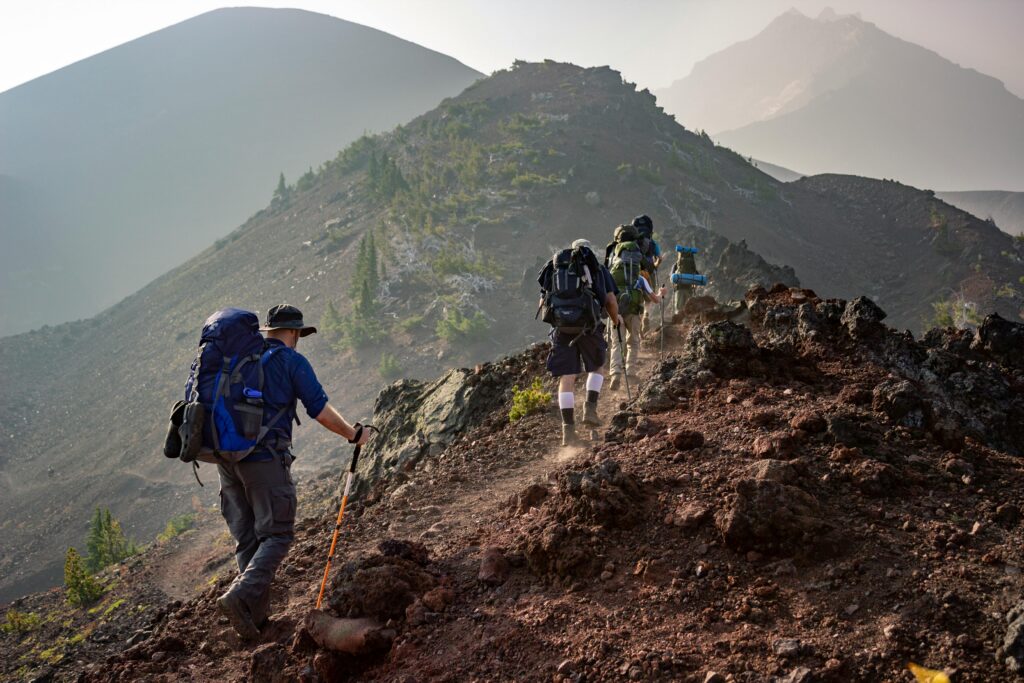
FIELD BRIEFING: In the field, a hike isn’t just a walk—it’s a patrol. Whether you are scouting a new trail or conducting a routine perimeter check, hiking patrols: tactical strategies for safe exploration are designed to keep you moving efficiently while minimizing environmental risk. Most hiking accidents occur due to a “Casualty of Confidence”—the moment an operator stops treating the trail with tactical respect and transitions into a casual mindset.
In 2026, safe exploration requires a blend of physical discipline, group cohesion, and high-performance gear. This briefing outlines the 8 pillars of the “Patrol Doctrine” to ensure your squad reaches the extraction point without compromise.
1. The Pace-Setter Protocol: Squad Cohesion
In group operations, the speed of the patrol is dictated by the slowest member. Splitting the group is a primary “Failure Point” that leads to lost operatives and communication breakdowns.
- Point Position Dynamics: Place the least experienced or slowest hiker second in line. This allows the LeadScout to set a sustainable pace while keeping the “Tail” (the rear of the line) from being left behind. By sandwiching the slower operative between two experienced scouts, you ensure their safety is monitored at all times.
- The “L-Shaped” Break: Every hour, execute a 5-to-10-minute “Sustainment Stop.” Do not wait until you are exhausted to hydrate or fuel up. These breaks are for more than rest; they are for conducting “Gear Checks” and “Hot-Spot” (blister) mitigation. Check out our Sustainment System Briefing to learn how to optimize your trail nutrition.
2. Terrain Sighting and Ground Intelligence
Maintaining situational awareness means scanning beyond the path in front of your boots. You must actively look for “Ground Intelligence” that indicates shifting hazards or biological presence.
- Hazard Identification: Scan for loose shale, wet roots, or unstable “river-rock.” If the terrain shifts to a “Black Route” (steep, high-exposure, or technical), stop the patrol. Reassess your squad’s ability to extract safely before proceeding.
- Biological Indicators: Identify animal tracks or scat on the trail. If you find fresh predator sign, increase your “Audio Deterrence” (periodic call-outs) to avoid a surprise encounter in thick brush.
3. The “Base Commander” Tool: Black Diamond Pursuit Trekking Poles
For 2026, we recommend the Black Diamond Pursuit Trekking Poles as a mandatory “Stability Augmenter.” These are not just walking sticks; they are specialized tools for hiking patrols: tactical strategies for safe exploration.
- Kinetic Management: These poles save your knees during steep descents by absorbing up to 25% of the impact force. They allow you to maintain your “Patrol Rhythm” for longer durations by distributing the workload to your upper body.
- Multi-Role Capability: In a survival scenario, these poles serve as the primary “Center Pole” for emergency tarp shelters. Their ergonomic grips reduce hand fatigue, ensuring you retain the manual dexterity needed for “Knot-Work” or “Navigation Tasks” at the end of a long march.
4. Rucksack Distribution and “Load-Carrying” SOPs
A poorly packed bag is more than a nuisance; it is a tactical liability that shifts your center of gravity and leads to premature fatigue and muscular skeletal stress. Professional hiking patrols: tactical strategies for safe exploration prioritize “Load Neutrality” to ensure the rucksack moves as an extension of the body rather than a weight fighting against it.
- The High-Center Rule: Position your heaviest items—such as your hydration bladder, bear canister, or climbing hardware—close to your spine and centered between your shoulder blades. By keeping the mass near your natural center of gravity, you prevent the pack from “pulling” you backward. This ensures your “Patrol Balance” remains stable during high-stakes maneuvers like technical stream crossings or narrow ridge traverses where a single stumble could be catastrophic.
- Symmetry Check and Lateral Stability: Ensure the weight is distributed equally between the left and right sides of the pack. An unbalanced load causes “Gait Imbalance,” forcing your core and hips to overcompensate. Over a 10-mile patrol, this leads to significant joint inflammation and localized fatigue that can compromise your ability to react to sudden terrain shifts.
5. Navigational “Check-Points” and Handrails
Never hike “blind” or become over-reliant on a digital cursor. Use the physical terrain to verify your position every 30 minutes to maintain “Spatial Certainty.”
- The Handrail Technique: Identify distinct, linear features such as ridgelines, rivers, or valley floors to use as “Handrails.” These serve as parallel markers that keep you oriented toward your objective even if you lose the physical trail. If you know the river is always to your East, you can never be truly lost.
- Back-Azimuth Planning (The Reverse Recon): Terrain looks drastically different when viewed from the opposite direction. Periodically stop and look behind you to memorize the “Return View.” This “Reverse Recon” is a vital part of your weather strategy; if a storm forces a rapid retreat, you will recognize the landmarks required for a smooth extraction back to the trailhead.
6. Micro-Climate Management (The “Be Bold, Start Cold” Rule)
In the field, sweat is the primary enemy of thermal stability. Once your base layer is saturated, your body’s ability to regulate its “Heat Core” is compromised. Proactive layer management is a foundational skill in hiking patrols: tactical strategies for safe exploration.
- Venting SOPs and Metabolic Heat: If you feel a “Hot-Spot” of perspiration building on your back or under your arms, stop and shed a layer immediately. The “Be Bold, Start Cold” doctrine suggests you should begin your hike feeling slightly chilled. Within 10 minutes of movement, your metabolic output will bring you to the optimal “Cruising Temperature” without soaking your clothes.
- The “Stop-Layer” Discipline: Your heart rate drops rapidly during a break. The moment the patrol stops for more than 5 minutes, you must put on your “Static Layer” (puffy jacket) to trap your existing body heat. Do not wait until you feel a chill; by then, your core temperature has already begun to drop, making it harder to re-warm once the patrol resumes.
7. Stream Crossing and Aquatic Hazards
Moving water is one of the most powerful and unpredictable forces you will encounter. Stream crossings represent a high-consequence phase of any patrol where gear and personnel are at maximum risk.
- The “Unbuckle” Protocol: Before entering any water deeper than your knees, you must unbuckle your rucksack’s waist belt and sternum strap. This is a life-saving SOP: if you lose your footing and are swept into the current, your pack will act as an anchor, potentially pinning you against submerged rocks. You must be able to jettison the load immediately to regain buoyancy.
- Three-Point Contact Mechanics: Use your Trekking Poles to maintain three points of contact with the riverbed at all times. Move only one “limb” (a foot or a pole) at a time, ensuring your next anchor point is stable before shifting your weight. This “Tripod Stability” is the only way to navigate slick, moss-covered stones in a fast-moving current.
8. The “No-Trace” Stealth Doctrine
A tactical patrol leaves the environment exactly as they found it. This is not merely an ecological preference; it is about “Signature Management”—denying any observer or predator the knowledge of your presence and route.
- Perimeter Integrity and Human Footprint: Pack out every scrap of trash and avoid disturbing natural ground cover or breaking low-hanging branches. By minimizing your “Human Footprint,” you reduce the likelihood of attracting curious wildlife to your route and ensure that your “Mission Signature” remains invisible to anyone following the trail.
- Sound Discipline and Environmental Intel: Keep vocalizations to a “Functional Level” only. Excessive chatter is a tactical distraction that prevents the squad from hearing “Environmental Intel”—the snap of a branch, the change in wind speed, or the distant rumble of a storm. In the wild, your ears are as important as your eyes for maintaining 360-degree situational awareness.
Final Debrief: Respect the Trail
Hiking patrols: tactical strategies for safe exploration are about maintaining the “Scout Mindset.” By pacing your squad, using stability tools, and maintaining situational awareness, you ensure that every mission is a successful one.
Maintain the Pace. Scan the Ground. Stay Ready.
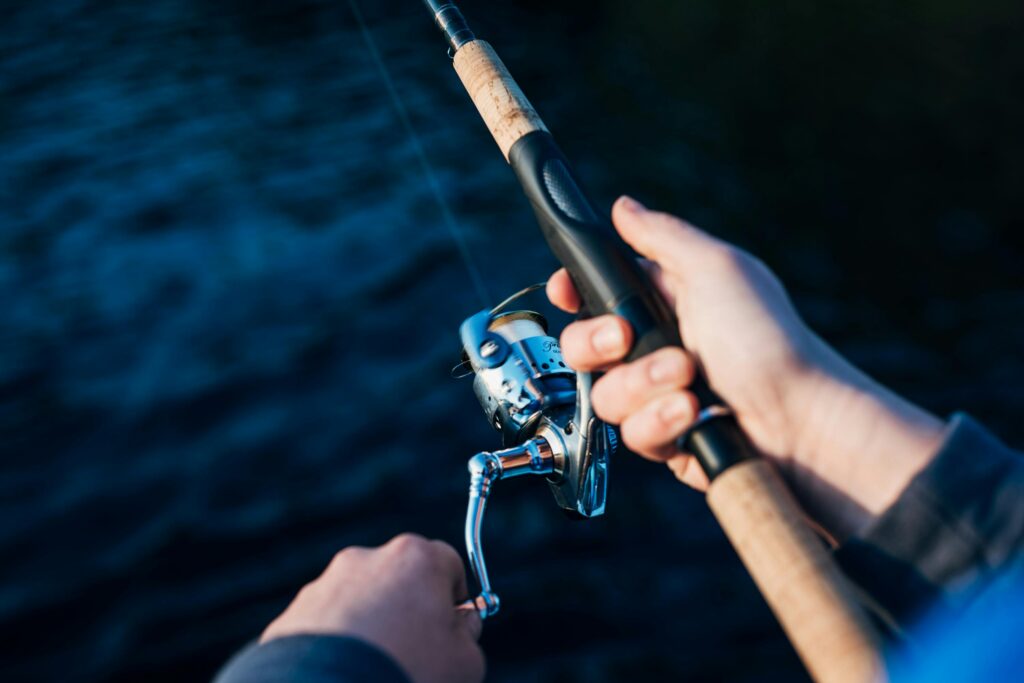
Fishing and water ops represent the ultimate test of a scout’s ability to provide for the squad while maintaining situational awareness. In a survival or long-term camping scenario, water isn’t just a scenic feature; it is a primary resource for hydration and high-yield protein extraction.
However, operating near water requires a specific set of “Rules of Engagement” to ensure you remain dry, safe, and successful. For the modern operative, mastering fishing and water ops is about more than just throwing a line—it’s about understanding aquatic topography, stealth approaches, and the tactical tools required for field processing. This 2026 manual provides the essential intel you need to dominate the shoreline and turn the water into your greatest logistical asset.
1. The Strategic Importance of Fishing and Water Ops
In any wilderness deployment, your proximity to water defines your operational longevity. Fishing and water ops allow a camper to supplement pre-packed rations with fresh, calorie-dense nutrition. This reduces the weight of your initial loadout and provides a massive boost to team morale.
However, water is also a significant hazard. Slippery terrain, rapid temperature shifts, and the risk of waterborne pathogens mean that every move must be calculated. A disciplined approach to fishing and water ops ensures you harvest the benefits of the river without falling victim to its deadly risks.
2. Shoreline Reconnaissance: Identifying High-Value Targets
Before you deploy your gear, you must conduct a thorough recon of the Area of Operations (AO). Fish are like any other tactical target—they seek cover, proximity to food, and stable conditions.
- Structure and Cover: Seek out “Submerged Intel.” Fallen logs, undercut banks, and large boulders create eddies where fish can rest out of the main current while waiting for food.
- The Temperature Gradient: In the heat of the day, fish move to deeper, cooler “Bunker” zones. During the low-light hours of dawn and dusk, they move to the shallows for active feeding sorties.
- The Stealth Approach: Fish are sensitive to vibration and shadows. When executing fishing and water ops, approach the bank slowly and stay low to the horizon. If you can see the fish, they’ve likely already compromised your position.
3. Tactical Gear for Aquatic Extractions
When fishing and water ops are part of the mission, your gear must be “Multi-Role.” You don’t want a heavy, 7-foot civilian rod taking up space in your rucksack.
- Tenkara Systems: For the tactical camper, Tenkara (fixed-line) rods are a game-changer. They are telescoping, ultra-light, and have no reels to jam or fail in the field.
- The “Go-Bag” Tackle Kit: Your kit should be minimal. A selection of hooks, split-shot weights, and a few versatile lures like the Mepps Aglia or a simple Rooster Tail can handle 90% of freshwater targets.
- Wading Boots: If your mission requires entering the water, ensure your footwear has aggressive lug soles or felt pads to prevent a “Tactical Slip” on moss-covered rocks.
4. The “Base Commander” Tool: PLUSINNO Compact Folding Rod
If you are looking for a “Force Multiplier” that fits perfectly into your fishing and water ops loadout, we recommend the PLUSINNO Compact Carbon Fiber Folding Fishing Rod.
Field Briefing: The PLUSINNO system is designed for high-mobility units. It features a collapsible carbon-fiber frame that shrinks down to less than 17 inches, making it easy to lash to the side of a tactical rucksack.
Why it’s Tactical:
- Space Efficiency: It integrates into your existing pack system without adding significant bulk.
- Structural Integrity: Despite its size, it has the backbone to pull medium-sized trout and bass from heavy cover.
- Corrosion Resistance: The stainless steel reel seat ensures it survives the “wet-work” inherent in fishing and water ops.
5. Sustainment: Field Processing and Preparation
Once a successful extraction is made, the mission transitions to processing. Fishing and water ops are not complete until the catch is prepared for the fire.
- The Quick Kill: To maintain protein quality, dispatch the fish immediately using a sharp blade to the brain. This prevents lactic acid buildup, which ruins the flavor.
- Field Dressing: Use a high-carbon steel knife to remove the entrails. Do this at least 100 feet from your main sleeping area to avoid attracting “apex competitors” like bears to your base.
- Cooking Rations: Small fish are best cooked “Whole-Field” style—gutted and wrapped in foil, then placed directly in the embers of your fire.
6. Water Safety SOP (Standard Operating Procedure)
Operating near water carries an inherent risk of “Cold Water Shock” and drowning. Follow these safety protocols for all fishing and water ops:
- The Buddy System: Never conduct deep-water extractions alone. Always have a teammate on the bank with a “Throw-Line” ready.
- PFD Discipline: If using a pack-raft or canoe, a Personal Flotation Device is non-negotiable Standard Issue gear.
- Hydration Intelligence: Never drink directly from the source where you are fishing. Always use your filtration system to purify water at least 200 feet away from your fishing hole.
7. Leave No Trace: Aquatic Integrity
A tactical operator leaves no sign of their presence. The shoreline is a sensitive environment that requires extra care during fishing and water ops.
- Monofilament Discipline: Spent fishing line is a “Biological Trap” for wildlife. Pack out every inch of line, including tiny clippings.
- Lead-Free Logistics: Use tungsten or tin weights instead of lead. This prevents heavy-metal contamination of the water supply you rely on.
- The Extraction Limit: Only take what you can eat. “Catch and Release” is the standard protocol unless sustainment is required for mission success.
Final Debrief
Fishing and water ops are an essential skill set for any scout looking to master the wilderness. By combining stealthy reconnaissance with high-performance tools like the PLUSINNO folding rod, you transform the river from an obstacle into a supply line.
Master the shoreline, respect the current, and stay fed.
Snow is more than just a scenic backdrop; it’s a high-maintenance terrain that requires specialized gear and a “never-quit” mindset. In sub-zero theaters, the environment is actively working to compromise your internal core temperature. Whether you’re establishing a base in the Rockies or a local forest, tactical winter camping requires moving beyond basic survival to “Climate Mastery.”
These protocols are designed to keep you warm, dry, and combat-effective. In the winter, “good enough” is a dangerous philosophy. You need a disciplined approach to layering, shelter fortification, and caloric sustainment to ensure your mission doesn’t end in a medical evacuation.
1. The Five-Layer Perimeter (Tactical Layering)
In the cold, moisture is the primary enemy. Sweat leads to rapid cooling and, eventually, hypothermia. You must manage your “micro-climate” using a modular system known in military circles as ECWCS (Extended Cold Weather Clothing System). This is the foundation of any successful tactical winter camping strategy.
- L1: The Base Layer (Moisture Wicking): Use Midweight Merino Wool or synthetic “waffle” tops. Never use cotton—it absorbs sweat, stays wet, and kills your heat retention.
- L2: The Mid-Layer (Grid Fleece): This traps air while remaining highly breathable. Look for “grid” patterns that allow moisture to move away from the body during high-intensity rucking.
- L3: The Insulation Layer (The Loft): This is your primary thermal barrier. A high-fill power down or synthetic “puffy” jacket traps heat in its loft.
- L4/L5: The Shell (Wind and Water): A waterproof, breathable hardshell (like Gore-Tex) to deflect wind and snow while allowing internal moisture to escape.
2. Fortifying the Sleep System: The R-Value Doctrine
Your tent protects you from the wind, but the frozen ground is what steals your heat through conduction. A professional tactical winter camping setup focuses heavily on the “Thermal Break” between the operator and the earth.
The R-Value Standard
For winter ops, you need a sleeping pad with an R-Value of 5.0 or higher. Anything less is a compromise that will leave you shivering by midnight.
The Stacking Hack (Dual-Layer Defense)
Layer a closed-cell foam pad (like the Therm-a-Rest Z Lite) under an inflatable insulated pad.
- Thermal Break: It creates a secondary barrier against the frost.
- Armor: It protects your expensive inflatable pad from punctures on frozen, jagged ground.
Mummy Protocol
Use a mummy-style bag rated at least 10 degrees lower than the expected forecast. Pull the draft collar tight to seal your “heat engine” inside the bag. Remember: a sleeping bag doesn’t generate heat; it retains the heat your body produces.
3. Hydration & Caloric Sustainment
Your body is a furnace; it needs fuel to generate thermal energy. If you run out of calories, your internal fire goes out, and your tactical winter camping mission fails.
High-Fat Rations (The Midnight Snack)
Eat a high-calorie, high-fat snack (like peanut butter, nuts, or cheese) right before bed. The metabolic process of digesting fats takes longer and generates consistent internal heat while you sleep.
The Upside-Down Trick (Liquid Access)
Store your water bottles upside down in the snow or inside your pack. Water freezes from the top down; storing them inverted ensures the lid doesn’t freeze shut, allowing you to access liquid water even in extreme temperatures.
4. The “Base Commander” Tool: Mr. Heater® Buddy® (2026 Edition)
When the mission requires a “Climate-Controlled” environment inside the tent to dry out gear or boost morale, there is one industry standard that consistently delivers. We recommend the Mr. Heater® Portable Buddy®.
- Field Briefing: For 2026, the Portable Buddy remains the most trusted radiant heater for outdoor operators. It delivers 4,000 to 9,000 BTUs of clean-burning heat, capable of warming a 225-square-foot space in minutes.
- Why it’s Tactical: It features a Low Oxygen Shut-off System (ODS) and a Tip-over Safety Switch. If the heater detects a drop in oxygen or gets knocked over, it kills the fuel line instantly.
- Pro-Tip: Always ensure you have at least 4 square inches of ventilation in your tent when running any heater to maintain a fresh oxygen supply. Never sleep with a heater running unless you have a dedicated CO detector.
5. Night Ops: The “Sacred Socks” and Heat Core
Success in tactical winter camping is won in the small details. These two protocols are non-negotiable for experienced operators.
The Sacred Socks Rule
Keep one pair of heavy, 100% wool socks inside your sleeping bag at all times. They are never to be worn for hiking, camp chores, or scouting. They stay bone-dry and are used strictly for sleeping. Putting even slightly damp socks into a sleeping bag will ruin your insulation.
The Radiant Heat Core
Before hitting the sack, boil water and fill a hard-plastic bottle (like a Nalgene). Ensure the seal is 100% secure. Wrap it in a spare sock and toss it into the bottom of your bag. This acts as a heater for your feet, lasting up to 6 hours, and provides pre-warmed liquid water for your morning coffee.
6. Site Recon: Choosing the Winter Outpost
In tactical winter camping, location is everything. Avoid “Cold Sinks”—low-lying valleys where cold air settles.
- Windbreaks: Pitch your shelter behind natural features like treelines or large boulders.
- Sun Exposure: Position your tent to catch the first rays of the morning sun (East-facing) to help thaw gear and boost team morale.
Final Debrief
Winter camping isn’t about “braving” the cold; it’s about outsmarting it through superior logistics and discipline. Use your layers to stay dry, your gear to stay insulated, and a reliable heater like the Mr. Heater Buddy to maintain camp morale.
For more intel on the specific apparel needed for these missions, check our [Internal Guide to Merino Wool Base Layers] (Placeholder Link).
Mission Ready. Stay Warm.